
Monitor setup is simply the process of installing your display and getting it ready to use. It sounds basic, but it matters more than you think. Poor setup causes neck pain, eye strain, and wasted desk space. A good setup means comfort, clarity, and efficiency. This guide walks you through every step. From unboxing to calibration. From cables to software settings. By the end, your monitor will be perfectly configured for how you actually work.
Key Takeaways
- Proper monitor setup starts with planning your workspace and gathering the right tools before you begin
- Physical installation includes choosing between traditional stands, VESA mounts, or desk arms based on your needs
- Ergonomic positioning matters: monitor height should place the top third of the screen at eye level when you sit normally
- Connection types vary by device; HDMI and DisplayPort are most common for modern setups
- Cable management keeps your desk clean and prevents accidental disconnections during work
- Software configuration on Windows or macOS lets you arrange multiple monitors and adjust resolution settings
- Calibration improves colour accuracy and reduces eye strain, especially important for content creators
- Specialised setups for gaming, home offices, or creative work need different optimisations
- Regular maintenance extends monitor lifespan and maintains image quality
- Guilds Altura Stand offers integrated monitor setup solutions combining mounting with USB connectivity and storage
Monitor Setup Essentials And Preparation

Before you plug in anything, plan. Good planning prevents mistakes.
- Start by choosing your location. Where will your monitor sit? Your desk? A wall? A monitor arm? Think about what works best for your space and workflow. Small flat? A wall mount saves precious desk space. Work from home? A desk arm gives you flexibility. Gaming setup? Multiple monitors might be your goal.
- Next, gather your tools. You do not need much. A Phillips screwdriver. An Allen wrench (usually included with mounting hardware). A small towel for cleaning. Some zip ties for cable management. That is honestly all most people need.
- Check your workspace. Clear it. Remove clutter. You need room to move around. You need a safe surface to set your monitor down. The carpet is good. Tile is not (slippery). A soft cloth protects your screen from scratches.
- Safety matters. If you are mounting a monitor on a wall or arm, make sure the hardware can support the weight. Check the weight capacity. Your monitor should be well below the maximum. Do not guess. Do not take risks with expensive equipment.
Finally, gather all the cables and adapters you might need. HDMI cable. DisplayPort cable. USB cable if your monitor has USB ports. Power cable (comes with the monitor). USB-C adapter if you are connecting a laptop. Having these ready means no last-minute searching.
Physical Monitor Setup And Installation
Unboxing and initial inspection

Open the box carefully. Most monitors come well-packaged with foam protection. Remove the monitor slowly. Do not yank it out. Damaged screens are expensive to replace.
Check what is inside. You should find the monitor, a power cable, and usually one video cable (HDMI, DisplayPort, or USB-C, depending on the model). Some boxes include a stand. Others include VESA mounting hardware. Read the contents list to confirm everything arrived.
Inspect the screen itself. Look for damage. Cracks. Dents. Discolouration. If you see problems, contact the retailer immediately. Most offer return windows of 14-30 days for damaged items.
Set the monitor face-up on a soft surface. Do not leave it face down. Do not stack things on top of it. Treat it gently. You are setting up a precision tool, not a piece of furniture.
Monitor stand assembly and mounting

Most monitors come with a basic stand. Assembly is usually simple. Two or three screws. Maybe a small amount of adjustment. Follow the instruction manual precisely. Do not skip steps.
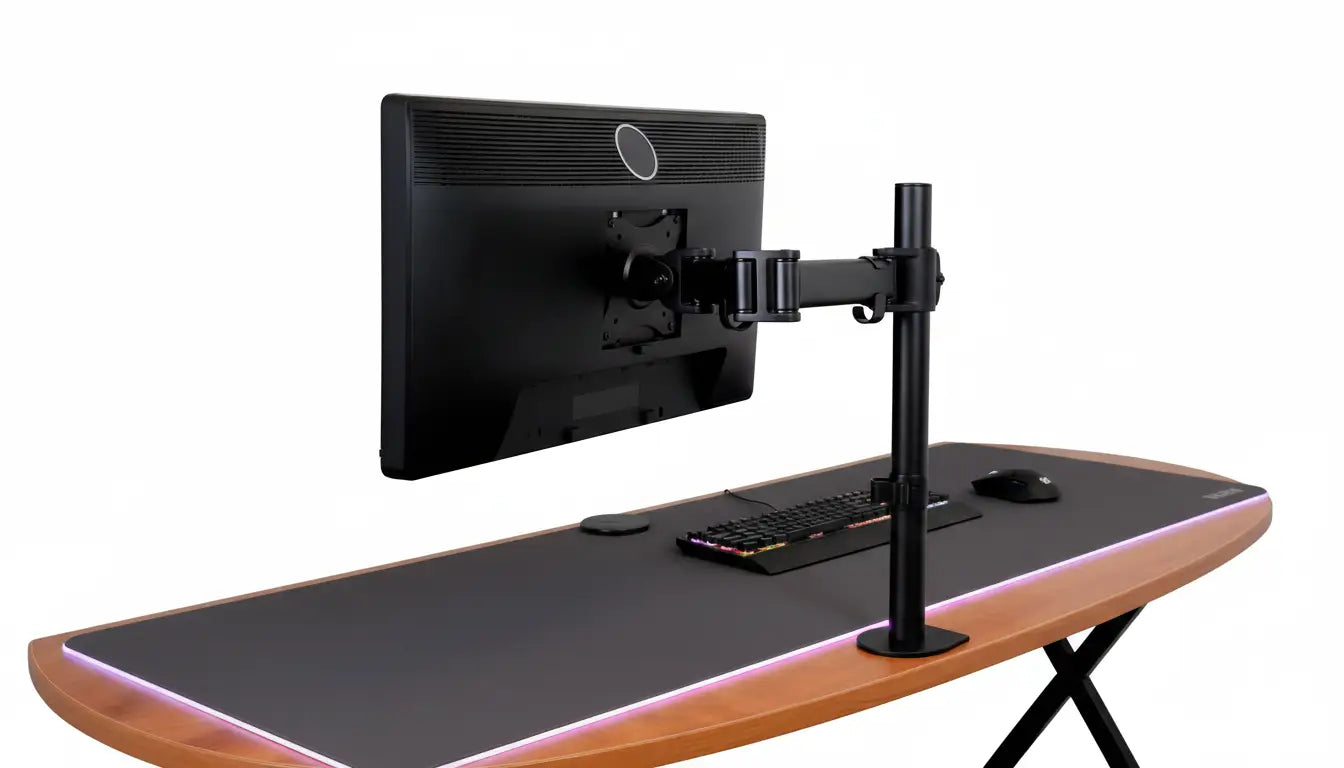
If you prefer a VESA mount instead of the included stand, check if your monitor has VESA compatibility. Look at the back. Four holes arranged in a square? Your monitor is VESA-compatible. No holes? You might need an adapter.
VESA mounting options include desk arms, wall brackets, and pole mounts. Desk arms are most popular because they offer height adjustment and swivel. Wall mounts are good for saving desk space. Pole mounts work in specific situations.
Whatever you choose, make sure it is stable. No wobble. No flex when you push the monitor gently. Instability is dangerous and distracting.
Ergonomic positioning and height adjustment
Height matters more than people realise. Your monitor should be positioned so your eyes look straight ahead at the top third of the screen. Not down. Not up. Straight.
To find the right height, sit in your normal work position. Close your eyes. Open them and look straight ahead. Your eyes should land roughly at the top third of your screen. If they land lower, your monitor is too low. If they land higher, it is too high.
Viewing distance should be roughly 50-70 centimetres from your eyes to the screen. About an arm's length away. This reduces eye strain and lets you see the entire screen without moving your head constantly.
Screen angle matters too. Tilt the monitor slightly backward (about 10-20 degrees). This reduces glare and reflections. It also reduces the strain on your neck from looking down slightly.
Make these adjustments slowly. Small changes make big differences in comfort. Spend a few days with the setup. If something feels wrong after a week, adjust it. Your body will tell you if the positioning is not right.
Monitor Connection And Cable Setup
Understanding display connection types

Alt tag: Collection of monitor cable connectors displayed side-by-side showing HDMI connector with 19 pins, DisplayPort connector with rectangular shape, USB-C connector, legacy VGA D-sub connector, and DVI connector for various monitor setup configurations
- HDMI is the most common connection today. Almost every monitor has at least one HDMI port. Almost every computer has at least one HDMI output. HDMI carries both video and audio. Simple and reliable.
- DisplayPort is newer and increasingly common, especially on gaming and professional monitors. It offers higher bandwidth than HDMI, meaning faster refresh rates and better image quality at high resolutions. Most modern laptops have USB-C with DisplayPort support.
- USB-C is becoming popular on newer monitors. Some monitors support video input via USB-C, which is convenient because you can charge and display simultaneously on compatible laptops.
- VGA and DVI are older connections. You might see these on older monitors or in professional settings. They work but are becoming obsolete. If your monitor has only VGA or DVI and your computer has only HDMI, you need an adapter.
Choose the connection based on what your monitor and computer both support. HDMI if available. DisplayPort for newer equipment. USB-C if your laptop supports it.
Connecting monitors to computers

Connecting is straightforward. Find the matching port on both your monitor and computer. Plug in the cable firmly. You should hear a small click if the connection is secure.
For laptops, you might need an adapter. A USB-C to HDMI adapter lets you connect a modern laptop to an older monitor. A USB-C to DisplayPort adapter offers higher quality. Buy these from reputable retailers. Cheap adapters sometimes cause problems.
If your monitor does not display an image after connecting, try these steps. First, check that the monitor is turned on (look for a power light). Second, check that your computer is not in sleep mode. Third, try the display shortcut on your keyboard (usually Function key plus a function key with a monitor symbol). Fourth, check the monitor's input source (most monitors have a small button on the back or side to switch inputs).
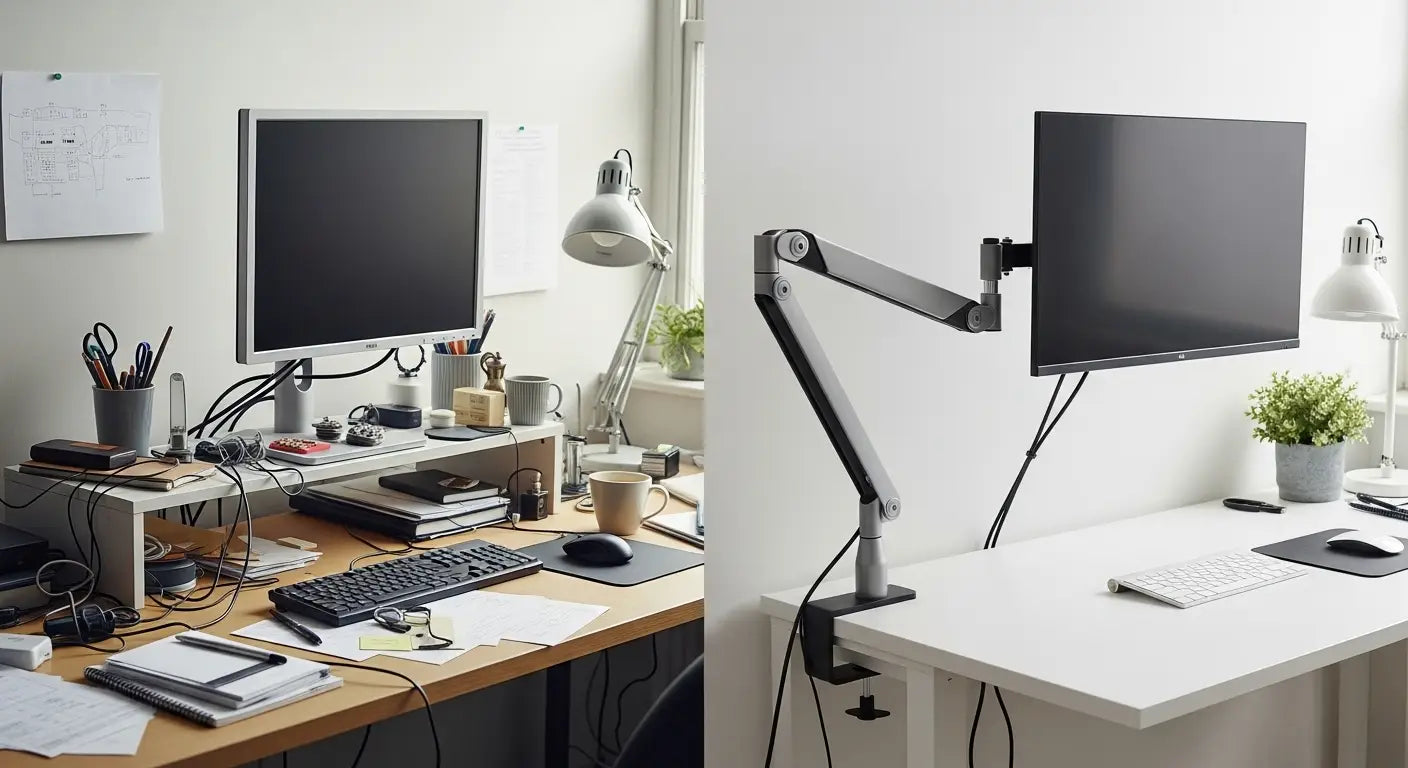
Cable management and organisation
Cables are inevitable. Good management keeps them tidy and prevents problems.
Use cable clips or ties to bundle cables together. Run them along the back or underside of your desk where they are hidden. Do not let cables hang loose where you might trip on them or they might pull disconnected accidentally.
If you have multiple cables, label them. A small label maker or even masking tape works. This makes troubleshooting easier later when you cannot remember which cable is which.
Avoid sharp bends in cables. Excessive bending damages internal wires. Use smooth, gentle curves instead. If a cable is too short, use an extension cable rather than stretching the original.
Keep the space behind and below your monitor accessible. You might need to reconnect something or adjust settings. Do not trap cables behind furniture where you cannot reach them.
Software Configuration And Display Settings
Windows display settings configuration
On Windows, right-click your desktop and select "Display settings". This opens the control panel, where you manage your display.
Here you can adjust the resolution. Higher resolution (like 2560x1440 or 3840x2160) means sharper images but smaller text. Lower resolution (like 1920x1080) means larger text but less screen space. Choose based on your monitor's native resolution (listed in the spec sheet) and what feels comfortable for your eyes.
You can also adjust scaling. If the text is too small, increase the scaling to 125% or 150%. This makes everything larger without changing resolution.
If you have multiple monitors, this is where you arrange them. Windows automatically detects them. You can drag the display icons around to match your physical setup. This helps Windows know which way to move your mouse when you move between screens.
Advanced settings let you adjust refresh rate (for gaming) and colour depth. For most users, the default settings work fine. Leave these unless you have a specific reason to change them.
macOS monitor setup and configuration
On macOS, go to System Preferences and select "Displays". Here you manage your display settings.
Resolution options are similar to Windows. Choose your monitor's native resolution for the sharpest image. Scaling options appear if you want larger or smaller text.
For multiple monitors, macOS automatically arranges them. You can see a visual representation and adjust their positions if needed. The monitor with the white bar is your main display (where menus appear).
macOS also has "Arrange" options that let you choose which display is main and set up how your cursor moves between screens.
Colour profiles are important on macOS. If you are doing colour-critical work (photography, design), you might need to load a specific colour profile for your monitor. Most monitors include a profile on a CD or downloadable from the manufacturer's website.
Multiple Monitor Setup Configurations
Dual monitor setup strategies
Two monitors give you roughly double the screen space. Common arrangements are side-by-side (one on the left, one on the right) or stacked (one above the other).
Side-by-side is most popular. Your main work happens on one screen. Reference material appears on the other. A writer puts their document on one monitor and references websites on the other. A trader watches price charts on one and executes trades on the other.
Stacked arrangements are less common but useful for specific work. Programmers sometimes stack monitors to see more code vertically. Video editors stack one forthe timeline and one for preview.
Windows calls this "extended display". Your cursor moves seamlessly between screens. You can drag windows from one monitor to another.
Some people prefer a "mirrored" display where both screens show the same image. This is useful for presentations but wastes screen space for normal work. Extended is better for productivity.
Triple monitor and ultrawide setups
Three monitors create an immersive workspace. Programming, trading, gaming all benefit from the extra space.
Arrange them horizontally for a panoramic view. Or mix orientations: centre monitor landscape, two side monitors portrait (rotated 90 degrees). This arrangement suits some workflows perfectly.
Ultrawide monitors (like 34-inch curved displays) can replace a dual or triple setup. One massive screen instead of multiple smaller ones. Less bezels (the black borders between monitors). Smoother experience. But more expensive upfront.
Your graphics card must support multiple monitors. Most modern GPUs handle two to four displays easily. Check your GPU specs if you are unsure.
Vertical and mixed orientation setups

Some people rotate monitors to portrait orientation (vertical instead of horizontal). This is useful for specific work. Programmers like the extra vertical space for code. Document readers like the narrower width matching a page.
You can mix orientations. Centre monitor in landscape, side monitors in portrait. This creates an asymmetric but functional setup.
macOS and Windows both support rotated displays natively. Just select "portrait" in display settings and your desktop rotates automatically.
Cable management becomes trickier with mixed orientations. Plan your cable routing carefully to avoid tangling.
Monitor Calibration And Optimisation
Basic colour and brightness adjustment
Your monitor is now installed and connected. Now optimise the image quality.
Brightness is the easiest adjustment. Use your monitor's physical buttons (usually on the back or bottom). Adjust until the image looks natural without feeling washed out or too dark.
Contrast is similar. Adjust until dark areas look dark but not completely black, and light areas are bright but not blown out.
Colour temperature affects the overall colour tone. Warmer settings (more red) are easier on eyes, especially in the evening. Cooler settings (more blue) look crisper but can cause eye strain. Most monitors let you choose between preset colour temperatures (like 5500K, 6500K, 9300K). For general work, 6500K is standard. For evening work, choose warmer (5500K or lower).
Many modern monitors have built-in calibration tools. These guide you through adjustment steps. They work reasonably well for casual use.
Advanced calibration techniques
If you do colour-critical work (photography, design, video), proper calibration matters. You need hardware calibration using a colorimeter (a device that measures colour accuracy).
Colorimeters cost money (usually £150-500) but deliver professional results. They create a custom colour profile for your specific monitor that ensures accurate colours. Photographers and designers rely on this.
If you do not do colour-critical work, skip advanced calibration. Basic adjustments are sufficient.
Gaming and refresh rate optimisation
Gaming monitors often support high refresh rates (144Hz, 240Hz, 360Hz). These mean the screen refreshes that many times per second, creating smoother motion.
To enable high refresh rates, go to your display settings and change the refresh rate setting. Your monitor and graphics card must both support the desired refresh rate.
Variable refresh rate technologies (G-Sync for NVIDIA, FreeSync for AMD) synchronise your monitor's refresh rate with your GPU's output frame rate. This eliminates screen tearing (visual artefacts) and is excellent for gaming.
To enable variable refresh rate, turn it on in your graphics control panel and your monitor's menu. Make sure your graphics card supports it.
Specialised Monitor Setup Scenarios
Home office monitor setup

Working from home requires a professional setup. Your background matters if you are on video calls. Position your monitor so your camera sees a neutral background behind you.
Lighting is important. Position your monitor so light does not reflect off the screen (glare). If possible, have a light source in front of you and your back to the window. This prevents harsh shadows.
Ergonomics matter more when you work from home all day. Make sure your monitor height, chair, and desk work together. Your arms should be roughly parallel to the ground when typing. Your monitor should be at eye level.
Consider a second monitor for productivity. One for your main work (email, documents, calls) and one for reference material or applications you check constantly.
Gaming monitor setup optimisation
Gamers want speed and clarity. Positioning matters for competitive games. Your monitor should be roughly arm's length away at eye level, positioned directly in front of you. Not off to the side where you have to look at an angle.
Response time is important. Modern gaming monitors claim response times under 5ms (the time it takes to change from one colour to another). Lower is better. Faster response time means less blur during fast movement.
Refresh rate matters too. 144Hz minimum for competitive gaming. 240Hz for serious competition. 360Hz for extreme gaming. Anything higher than your GPU can produce is wasted.
Enable gaming mode on your monitor. This usually disables unnecessary features like motion blur processing that add input lag (delay between your action and the screen response).
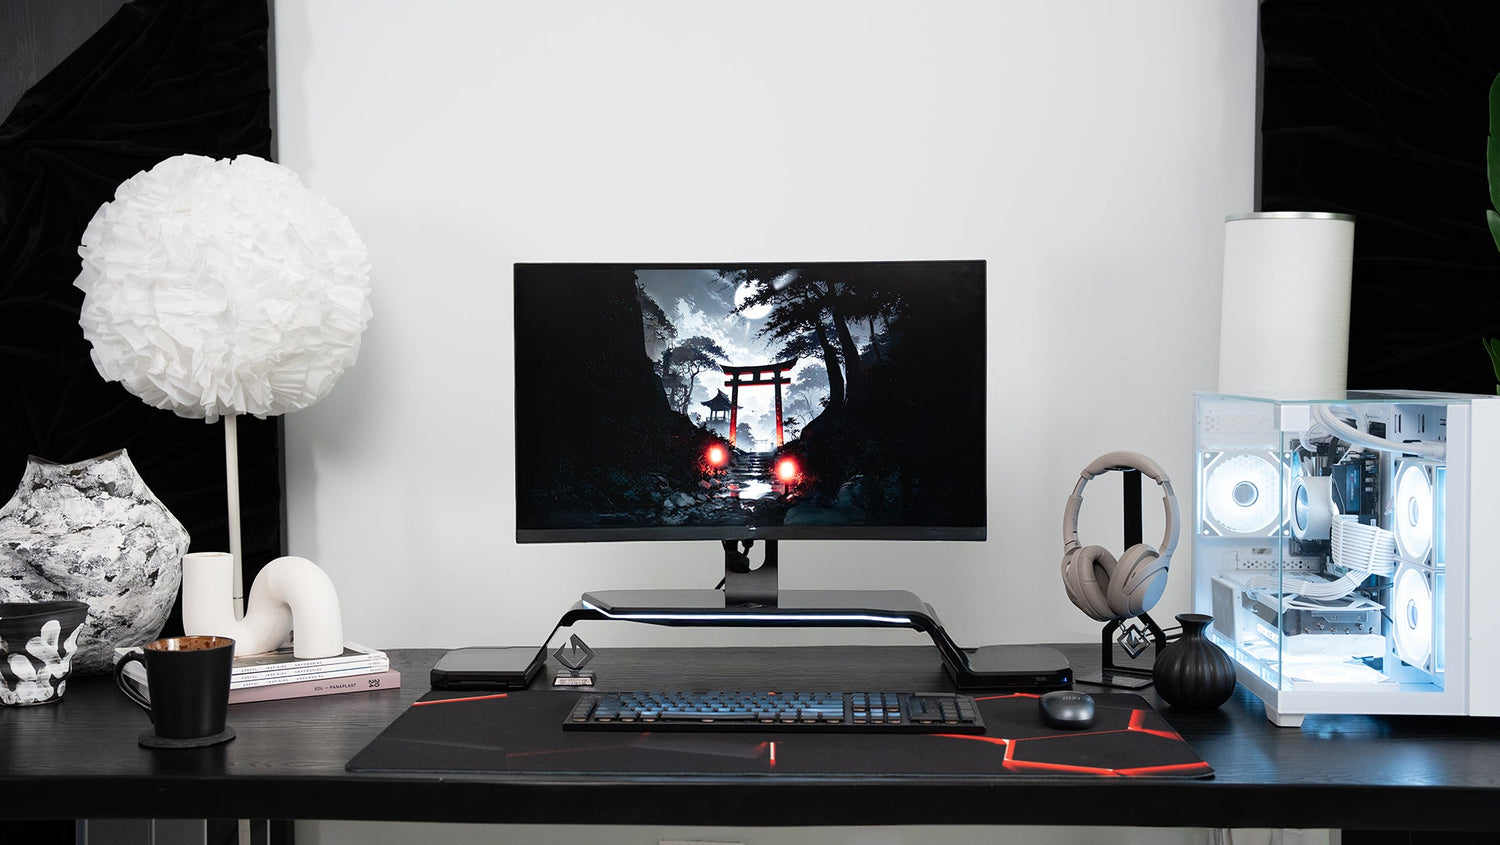
Explore Guilds Altura Stand if you want gaming setup that also looks great. The RGB lighting creates atmosphere, the height adjustment positions your monitor perfectly, and the integrated storage keeps your gaming peripherals organised.
Creative professional monitor setup

Content creators (photographers, video editors, designers) need accurate colour. This means proper monitor calibration and good lighting.
Calibrate your monitor with a hardware colorimeter if you do professional work. This ensures colours are accurate and your work will look correct on other people's screens.
Position your monitor directly in front of you in a well-lit room. Avoid direct sunlight or harsh shadows. Your lighting should be consistent throughout the day.
Consider a colour reference monitor. A second monitor showing a neutral grey screen helps you judge colour accuracy. When you are unsure if your colours are right, compare your work monitor to the reference.
Multiple monitors help too. One for your main work, one for reference material, one for colour tools. Three monitors is common in professional studios.
Troubleshooting Common Monitor Setup Issues
Problems happen. Most are easy to fix.
- No display or black screen. Check that the monitor is turned on (look for a power light). Check that your computer is not in sleep mode (press a key). Check that the video cable is fully connected. Try a different video input (some monitors have multiple ports). Restart your computer. These simple steps fix most problems.
- Resolution looks wrong. Your display settings might be set to the wrong resolution. Go to display settings and select your monitor's native resolution (usually listed in the spec sheet or automatically recommended).
- Text is too small or too large. Use the scaling setting in display settings. Increase it to make everything larger, decrease to make everything smaller.
- Multiple monitors not recognised. Windows or macOS might not detect them automatically. Restart your computer. Check that cables are fully connected. Try a different cable. Update your graphics drivers.
- Colours look wrong. Your colour profile might be incorrect. Load the colour profile that came with your monitor. Or adjust brightness, contrast, and colour temperature manually until it looks right.
- Screen flickers. Usually caused by refresh rate mismatch. Go to display settings and try a different refresh rate. Or it could be loose cables. Check all connections.
- One area of the screen is discoloured. Could be magnetic interference from nearby electronics. Move speakers, phones, or other devices away from your monitor. Or it could be dead pixels (individual pixels that no longer work). This is a hardware problem. Contact the manufacturer.
Monitor Setup Maintenance And Upgrades
Your monitor will last years with basic care.
- Cleaning. Dust accumulates on screens. Gently wipe with a soft, dry cloth. Never use liquid cleaners unless the monitor is specifically designed for it. Moisture damages electronics.
- Software updates. Your graphics drivers need updating periodically. Check for updates every few months. New drivers improve performance and fix bugs.
- When to upgrade. Monitors last 5-10 years typically. Upgrade when the screen develops problems, when you need higher resolution or refresh rate, or when you want additional features (like USB-C with video input).
- Future-proofing. Buy monitors with the connectivity you will need. USB-C is becoming standard. DisplayPort is more future-proof than HDMI for high-end displays. Larger monitors (27 inches or bigger) remain useful longer because the resolution matters less as screens age.
- Performance monitoring. Some tools let you check your GPU temperature and monitor refresh rate. Keep an eye on these. If your GPU runs hot, improve cooling or reduce graphics settings.
Frequently Asked Questions
What cables do I need for my monitor setup
HDMI is most common and works with nearly everything. DisplayPort is better for newer equipment and gaming. USB-C works on some modern monitors and laptops. You need a power cable (included) and usually one video cable. Length depends on your desk setup. Most people need 2-3 metres.
How do I setup dual monitors on Windows
Windows display settings panel with visual guide showing step-by-step process: connecting both monitors, detecting them in settings, arranging display icons to match physical positions, selecting primary monitor with taskbar, and dragging windows between screens demonstration
Connect both monitors. Go to Settings > System > Display. Windows automatically detects them. Arrange the display icons to match your physical setup. Set which monitor is primary (this is where your taskbar appears). Drag windows between monitors freely.
What is the best monitor setup for productivity
Three productivity setups displayed side-by-side: single 27-inch monitor for basic work, two 24-27 inch side-by-side monitors for improved productivity, and ultrawide 34-inch monitor for maximum screen real estate with cost and desk space considerations noted
For most people: one 27-inch monitor. For better productivity: two 24-27 inch monitors side-by-side. For maximum productivity: ultrawide 34-inch monitor or three monitors. It depends on your budget and available desk space.
How high should my monitor be positioned
Ergonomic height positioning diagram with side profile of person seated at desk showing top of monitor at or slightly below eye level, eyes landing on top third of screen when looking straight ahead, and proper neck posture without strain indicated
The top of your monitor should be at or slightly below eye level. When you sit normally and look straight ahead, your eyes should hit the top third of the screen. This prevents neck strain during long work sessions.
Can I mix different monitor brands in my setup
Dual monitor comparison showing two monitors from different manufacturers side-by-side displaying same content, illustrating minor colour variations between brands, different refresh rates and response times visible in performance metrics, and acceptability for productivity versus gaming workflows
Yes. Different brands work together fine. Colours might look slightly different between monitors, but this is acceptable unless you do colour-critical work. Refresh rates and response times can differ, which is fine for productivity work but annoying for gaming (one monitor will feel noticeably faster).
How do I setup a monitor for gaming
Gaming monitor settings interface showing high refresh rate enabled (144Hz or higher), variable refresh rate option activated (G-Sync or FreeSync), response time set to ultra-fast (1ms), gaming mode toggle switched on, and monitor positioned at arm's length directly in front of gaming chair
Enable high refresh rate in display settings. Enable variable refresh rate (G-Sync or FreeSync) if available. Position the monitor at arm's length directly in front of you. Enable gaming mode on the monitor. Choose a low response time setting if your monitor offers options.
What resolution should I use for my monitor setup
Monitor size and resolution compatibility chart showing: 1920x1080 HD resolution recommended for 21-24 inch monitors, 2560x1440 QHD for 27 inch displays, 3840x2160 4K resolution for 32 inch or larger monitors, with visual examples of sharpness differences at each resolution level
Use your monitor's native resolution. This is the resolution the panel was designed for and produces the sharpest image. For 1920x1080 (HD): 21-24 inch monitors. For 2560x1440 (QHD): 27 inch monitors. For 3840x2160 (4K): 32 inch monitors or larger.
Conclusion
Alt tag: Optimised workspace showcase displaying perfect monitor setup with ergonomic positioning, clean cable management, proper lighting, dual monitor extended display configuration, and Guilds Altura Stand with RGB lighting, creating a professional and organised setup
A good monitor setup takes just an hour or two, but improves your daily life for years. Proper physical installation, ergonomic positioning, correct cables, and software configuration all matter. Each piece alone seems small. Together they create a workspace that feels right.
Your monitor should be comfortable. The image should look good. The setup should be organised and professional. Follow this guide, and you will achieve all three.
At Guilds, we believe every workspace deserves to be optimised. Our Altura Stand VESA Edition combines monitor mounting with USB connectivity, RGB lighting, and storage. It is designed for people who care about both function and appearance. Visit our homepage to learn more about how Guilds transforms workspaces.
Ready to upgrade your setup? Contact our team with any questions. We help you build the workspace you deserve. Your setup can be better. It starts with one decision to optimise properly.
Leave a comment
This site is protected by hCaptcha and the hCaptcha Privacy Policy and Terms of Service apply.